


Table of Contents
Introduction
In today’s digital landscape, managing DNS records is crucial for ensuring your website’s accessibility and performance. Whether you’re pointing your domain to a new server, setting up email services, or configuring security settings, knowing how to update DNS records is essential. The Webuzo Control Panel simplifies this process, making it accessible even for those with limited technical knowledge. In this guide, we’ll walk you through the steps to effectively manage and update DNS records within Webuzo, ensuring your online presence remains robust and secure.
Here the steps for updating DNS Records in Webuzo Control Panel
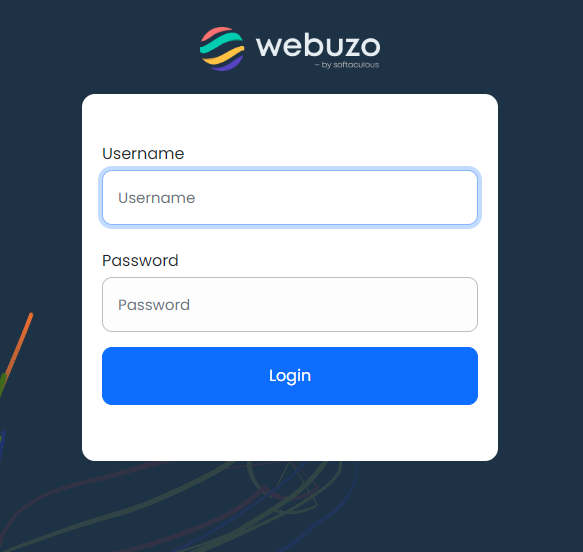
Step 1: Log in to Webuzo
- Open your web browser and go to your Webuzo Control Panel URL.
- Log in with your username and password.
Step 2: Access the DNS Zone
- Once logged in, look for the “DNS Zone Settings”
- Click on “Manage Zone” to view the DNS-records for your domain.

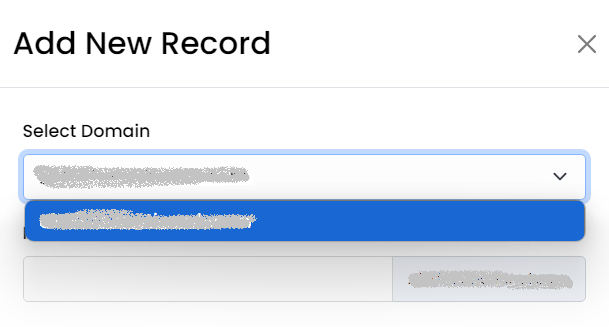
Step 3: Select Your Domain
- You’ll see a list of domains for which you can manage DNS-records.
- Select the domain you want to update.
Step 4: Update DNS Records
- You will see a list of existing DNS records (A, CNAME, MX, TXT, etc.).
- To update a record:
- A Record: Edit the IP address associated with your domain or subdomain.
- CNAME Record: Change the canonical name pointing to another domain.
- MX Record: Update the mail server details.
- TXT Record: Modify the text records used for verification purposes.
- Other Records: Update as needed according to your requirements.
- After editing, click “Save” or “Update” to apply the changes.
Step 5: Add New DNS Records (Optional)
- If you need to add a new DNS record, look for an “Add Record” button.

- Choose the type of record (A, CNAME, MX, TXT, etc.).
- Fill in the necessary details (e.g., Name, Type, Value).
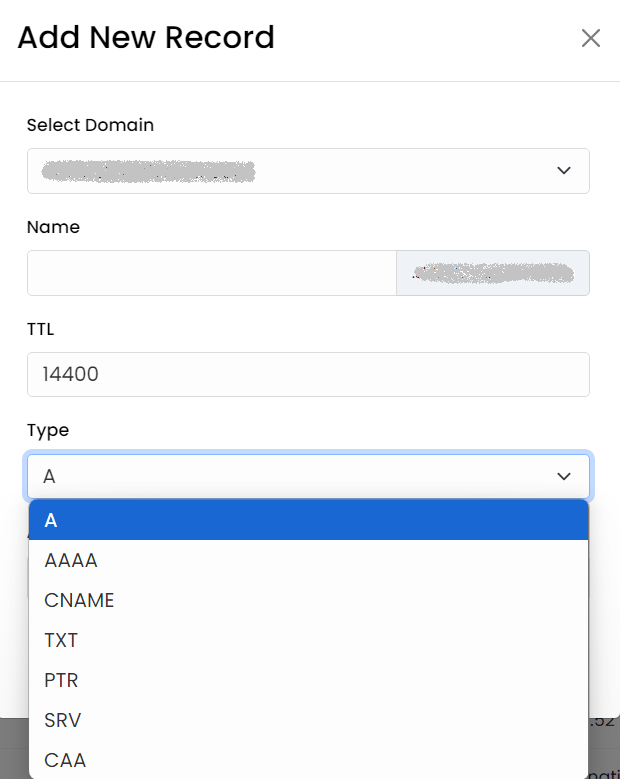
- Click “Add” or “Save” to add the new record.

Step 6: Apply Changes
- Review your changes and make sure everything is correct.
- Save your changes and allow some time for DNS propagation, which can take up to 24-48 hours.
Step 7: Verify Changes
- Use tools like DNS Checker or dig commands to verify that your DNS records have been updated correctly.
That’s it! You’ve successfully updated your DNS records in Webuzo.
Conclusion
Updating DNS records might seem daunting at first, but with the user-friendly interface of the Webuzo Control Panel, it becomes a straightforward task. By following the steps outlined in this guide, you can confidently manage your domain’s DNS settings, whether you’re making minor adjustments or major changes, or you can contact your hosting provider for assistance. Remember, proper DNS management is key to maintaining a seamless online experience for your users. Take control of your DNS settings with Webuzo and keep your website running smoothly.